AWS re:Invent 2019

I spent the last week at AWS re:Invent 2019 in Las Vegas with over 65,000 other AWS users. This conference is always jammed packed with announcements and interesting discussions with people both inside and outside of my normal security bubble. Overall I really enjoy this conference even though it is ridiculously large and I spent over 6 hours on the shuttles this week going between the 3 campuses of the conference.

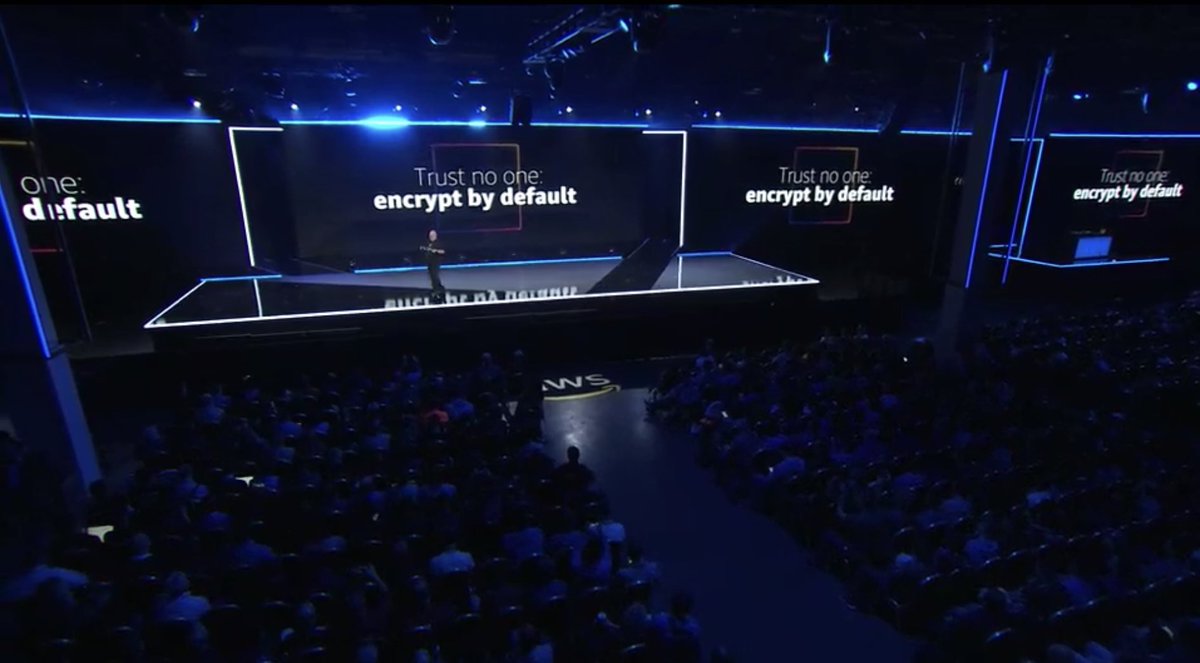
I was glad to see Amazon finally get serious about security that matters to both practitioners and audit teams. While Encrypted by Default only applies to their Nitro Enclaves at this point I hope this is the start of moving this principal to all of their services.
Image


Here are some roughly organized notes and thoughts about some of the services that were launched or announced this week that I was impressed or really confused about.

General Cloud

  • AWS Outpost
    • It is a rack full of AWS equipment they install in your data center and then you manage it through the AWS console. It only costs $225,504.81 for the entry-level model.
  • AWS Nitro Enclaves
    • Nitro Enclaves enables you to create isolated compute environments to further protect and securely process highly sensitive data such as personally identifiable information.
  • AWS ARM Processors
    • Amazon is launching its own Arm-based processors. You have wonder if at least part of this isn’t to hopefully avoid future side-channel attacks.
  • AWS Compute Optimizer
    • You pay AWS to tell you how to pay AWS less or something.
  • Ubuntu Pro
    • This is a customized version of Ubuntu to run on EC2 that comes with LivePatch and will have preinstalled hooks into the AWS security hub soon. On the downside, it does cost $.03 an hour to run which will end up costing about $25 a month per instance.

Security

Machine Learning

¯\_(ツ)_/¯

General & Uncategorized Thoughts

Automating Digicert Certificates Into AWS ACM

Like most security professionals I am spending a large amount of time helping my company move securely to AWS.
Certificate management in AWS is done with AWS Certificate Manager  and while they do offer *free* certificates, ACM generated certs are outside your direct control. You don’t get the keys which, at least for some things, should probably be a non-starter (granted, for plenty of other things it’s likely  ¯\_(ツ)_/¯).
I also really like digicert and have been using them for TLS certificates for over 10 years but I could not find any automation already built for Digicert to AWS ACM so I spent some time this week and hacked a script together to do it.
Here is a link to the script  (also embedded at the bottom of the post). On the host running the script you will need AWS CLI  configured and a Digicert API Key.  You also need to configure the first 15 lines of the script with your information.

To Run The Script:

./awasacm.sh your.fdqn.com

Script Output:

Here is what the script looks like running:

Here is the cert uploaded to ACM:

The script also saves all of the commands, keys and certs on the host running the script for auditing and backup:

Full Script:

https://gist.github.com/jgamblin/f8bd03d3743ba4f08f710d5e11c177c7

Closing:

I will be making improvements to this script as we implement it in production and will likely move it to a full GitHub repo soon.   If you have any questions please reach out to me on twitter at @JGamblin. 
Update:  I have built a full Github repo here.

Lyft Cartography Docker Container

I have been meaning to look at Cartography since I saw their talk at BSidesSF last year and I finally had a chance to start looking at it today. One of the first things I noticed was that is was not containerized so I built a quick container for it and decided to document my progress here.

Prerequisites

Build The Cartography Container

  • Create a local cartography directory.
  • Create a Dockerfile and copy this into it:
# syntax = docker/dockerfile:experimental
FROM ubuntu:latest
# Install Python
RUN apt-get update \
  && apt-get install -y python3-pip python3-dev wget apt-utils \
  && cd /usr/local/bin \
  && ln -s /usr/bin/python3 python \
  && pip3 install --upgrade pip
RUN pip install awscli \
    &&  pip install cartography
  • In your terminal open the cartography directory.
  • Build the container using: DOCKER_BUILDKIT=1 docker build -t cartography .

Run Neo4J Container

docker container run \
  -e NEO4J_AUTH=none \
  -v neo4j-data:/data \
  -p 7474:7474 \
  -p 7687:7687 \
  -d \
  neo4j:3.5.12

Run Cartography Container

docker run --rm -v $HOME/.aws:/root/.aws --net=host cartography cartography --neo4j-uri bolt://127.0.0.1:7687

This step will take a few minutes depending on the size of your environment.

Accessing The Interface

Once the container is done building you can access the web interface at http://127.0.0.1:7474/browser/

Closing Thoughts & ToDo List

Host Websites On Github

I have developed a bad habit of picking up vanity domain names and not really doing much with them. Last month at AWS Re:Invent I picked up ServerlessSecurity.org and really wanted to do something with it but didn’t feel like maintaining, or paying for, a VPS so after doing some looking around I found that is was possible to point a custom domain to Github pages.

The documentation they provide is a little lacking, so I figured I would put together a small how to for anyone who wants to do this for themselves.

Configure Your Github Repo

  • Select Your Theme:
  • Decide What Branch You Want To Host The Page In:
  • Enter Your Domain Name:
  • Enforce HTTPS
  • Finally, Edit Your Index.md file With Your Content.

Configure DNS

DNS configuration is pretty straightforward. You want to add the following IP addresses to your custom resource records.

185.199.108.153
185.199.109.153
185.199.110.153
185.199.111.153
This is what my records look like.

You Now Have A Website

After you configure your repo and update you DNS settings within 15 minutes or so your website should be live.

Conclusion

This is a really such simple method of hosting a website I parked the rest of my vanity websites:

I hope this is helpful for other people looking to host a website quickly.

Re:Invent Re:Cap & Re:ading

I spent this last week in Las Vegas attending AWS Re:Invent

This event is mind-numbingly massive with classes happening at 4 or 5 hotels all over the strip. I personally spent over an hour every day on their (nice but extremely slow) shuttle buses between the MGM Grand, Aria and the Sands Expo Center.

It would be impossible to see everything at this conference so throughout the week I compiled a list of services I wanted to investigate more, and I thought I would share them below.

Security

Serverless

Cloudless(?)

ML/AI

Devops

Grab Bag

Closing Thoughts

I had a great time this year and learned a ton. I am looking forward to playing with Security Hub and to finish reading the AWS Well-Architected Framework PDF soon.

I am disappointed that DeepRacer seems to be AWS just taking the DonkeyCar model and close sourcing it without mentioning the original project, even after they have had DonekyCars at the last 2 re:invents.

Lastly, I interested to see if security is deemphasized next year with the announcement of a security-focused conference called re:inforce.

60 Second Kali Box

I am a fan of Kali Linux and AWS so I love the fact that they have an official AMI.  While spinning up a Kali instance in AWS is fairly easy, I had a long flight today so I wrote a script that will spin up a Kali instance in about 60 seconds.
The script does the following:

  • Builds a security group that only allows SSH access from your current public IP.
  • Writes a new SSH Key in ~/Documents/instantkali/
  • Creates a t2.medium EC2 instance.

Here is the output: 
 
Here is the code:
https://gist.github.com/jgamblin/fff0bd2187f070390248c14cc9148062

Getting Started With Mod_Security

 
Mod_Security is the most widely known and used server based Web Application Firewall but I had not had a chance to play with it so I decided to take sometime this weekend to build a website (modsec.handsonhacking.org) to test it.   Here is a small walk through on how I did it.

Base Server Install:

I used AWS Lightsail to build a webserver using Ubuntu 16.04,  Apache2,  LetsEncrypt , and this HTML5 Template.
Install and configure the website with these commands:

sudo apt update && sudo apt upgrade -y
sudo apt install apache2 git -y
sudo rm /var/www/html/index.html
sudo git clone https://github.com/themefisher/Blue-Onepage-HTML5-Business-Template.git /var/www/html/
sudo add-apt-repository ppa:certbot/certbot
sudo apt-get update
sudo apt-get install python-certbot-apache
sudo certbot

Mod_Security Install

Install Mod_Security with these commands:

sudo apt-get install libapache2-modsecurity
sudo cp /etc/modsecurity/modsecurity.conf-recommended /etc/modsecurity/modsecurity.conf

Move from logging to blocking move with these commands:

sudo nano /etc/modsecurity/modsecurity.conf
# Change SecRuleEngine DetectionOnly
SecRuleEngine On

It should look like this:Install the updated OWASP ModSecurity Core Rule Set:

sudo rm -rf /usr/share/modsecurity-crs
sudo git clone https://github.com/SpiderLabs/owasp-modsecurity-crs.git /usr/share/modsecurity-crs

Enable them in the apache config file:

sudo nano /etc/apache2/mods-enabled/security2.conf
Add:
     IncludeOptional /usr/share/modsecurity-crs/*.conf
     IncludeOptional /usr/share/modsecurity-crs/rules/*.conf

It should look like this:
Move the OWASP rules from logging to blocking:

cd /usr/share/modsecurity-crs
sudo cp crs-setup.conf.example crs-setup.conf
sudo nano crs-setup.conf
Comment Out:
#SecDefaultAction "phase:1,log,auditlog,pass"
#SecDefaultAction "phase:2,log,auditlog,pass"
Uncomment:
SecDefaultAction "phase:1,log,auditlog,deny,status:403"
SecDefaultAction "phase:2,log,auditlog,deny,status:403"

It should look like this:

Next restart apache to enable mod_security:

sudo systemctl restart apache2

Testing

To test I used burp suite to scan modsec.handsonhacking.org to generate plenty of “bad traffic”.

Run this to see what is being blocked in real time:

sudo tail -f /var/log/apache2/modsec_audit.log

Next Steps

Now that I have mod_security running I need to find a better logging solution.   So far I have quickly looked at waf-fle and auditconsole but they both look to be abandoned.  It looks like there are people who are doing a lot with ELK but I have not found anything solid yet.  I am really surprised there isn’t a ready made Dashboard but I will keep looking.

Warning:

I have spent all of four hours playing with this on non-production traffic.  Please do not just install this in front of your website and then blame me when things break.

Closing:

Overall with the help of @infosecdad  and @lojikil guiding me through some of the places where documentation is lacking it was fairly easy to get this setup and going.   If you have any questions please reach out to me on twitter at @JGamblin. 

Run SSH and HTTPS On The Same Port

I recently saw this SSH/HTTP(S) multiplexer on Github and tweeted that it looked amazing:


A couple of people responded that you should be able to do the samething with HAProxy or something similar but my experience with HAProxy has been that is temperamental so I didn’t want to mess with it.  After some more research I found a tool called SSLH that did what I wanted so I built a demo site at  sshttps.jgamblin.com that is running SSH and HTTPS on port 443.

How To Build It Yourself:

To demo this I used a $5 Ubuntu AWS lightsail instance with a valid DNS record (sshttps.jgamblin.com)

Base Out The System:

These commands will update the system, install SSLH and Apache, and install a valid TLS certificate from LetsEncrypt:

sudo apt update && sudo apt upgrade
sudo apt install sslh build-essential apache2
wget https://dl.eff.org/certbot-auto
chmod a+x ./certbot-auto
./certbot-auto

Configure SSHL:

You need to edit the config so that <ETH0 IP> is the local (not public) IP:

sudo nano /etc/default/sslh
DAEMON_OPTS="--user sslh --listen <ETH0 IP>:443 --ssh 127.0.0.1:22 --ssl 127.0.0.1:443 --pidfile /var/run/sslh/sslh.pid"

Configure Apache:

You just need to change Listen *:443 to Listen 127.0.0.1:443

sudo nano /etc/apache2/ports.conf
<IfModule ssl_module>
        Listen 127.0.0.1:443
</IfModule>
<IfModule mod_gnutls.c>
        Listen 127.0.0.1:443
</IfModule>

Reboot and Enjoy:

You can probably restart services but a  sudo reboot works here and you are good to go.  If you visit with a web browser you get the page:

…*but* you can now ssh into the box on port 443 using ssh [email protected] -p 443

Closing Thoughts:

NMap only knows it is SSH if you use -sV:
I am looking forward to using this method in the future to stack services.  Let me know on twitter @jgamblin if you have any thoughts.

Finding Additions To The Umbrella DNS Popularity List

Since I have started looking at the Umbrella DNS Popularity List I was interested in seeing how much the data changes day to day.  I fired up RStuido and wrote some terrible code but finally got it to work with some help.
Yesterday there were 80937 new DNS names on the list that were not on the list the day before.
(Update: Here is a CSV of the 169366 domains that were not on the list April 1st but was on the May 1st list.)
Here are the new additions on a map:

Link to the full screen map.

Here is a CSV of the data with GEOIP information added. 
Here is code I ended up with if you want to build your own:
https://gist.github.com/jgamblin/e665abadbafdd4757d484b728a74383c
Up next is to run these domains through Virustotal to see if any of them are bad.
Here is a picture semi related to this blog post to make it look pretty when I share it on social media. 

Big Data’ing The Umbrella DNS Popularity List

Recently I started looking at the Umbrella DNS Popularity List and did a blog post about it here. The data seemed valuable and lacking at the same time so I spent my *limited* free time this week learning about R and RStudio.
Protip:  If you want to play along at home there is an RStudio docker container so all you need to do is:

docker run -d -p 8787:8787 -e USER=<username> -e PASSWORD=<password> rocker/rstudio

Getting today’s list loaded into R is as simple as:

# Get Todays List
if (file.exists(fn)) file.remove(fn)
temp <- tempfile()
download.file("http://s3-us-west-1.amazonaws.com/umbrella-static/top-1m.csv.zip",temp)
unzip(temp, "top-1m.csv")
today <- read_csv("top-1m.csv", col_names = FALSE)
unlink(temp)

Now you have the Top 1 million DNS requests from Umbrella ready to be “big data’ed”.
At the start of this project I wanted to do the following:
Search the DNS names for keywords. (Done).
Map all the DNS records on a map. (Done, Kinda).
Compare today’s and yesterday’s records for new DNS records.
Check all the DNS records against Censys and record open ports, and software.
Check all the DNS records against VirusTotal and see if any of them are known bad.
Check all the DNS records against SSLLabs and record SSL grade.
Take a nap.
My limited results so far follow with hopefully more to come.

Search The DNS Names

I wanted to do this to be able to search the list for a keyword and build a table and map of the data.  This was fairly easy and with help of leaflet and datatables here is the output of searching today’s data for cisco.
Here is the map:

Here is a link to the data. 
Here is the R code I wrote:
https://gist.github.com/jgamblin/7615b81cedd10e44d4f2220347b69cb0

Map All The DNS Records On A Map.

I got started on this and quickly realized that looking up the GEOIP information and mapping a million DNS records was going to take a week so I decided to do the Top 25,000 as a POC and come back and do all 1,000,000 later (maybe).
Here is the 25,000 Map:
Here is the R code I wrote:
https://gist.github.com/jgamblin/ccf3390bc5d2ce922cd5df38a40617b4
I also built a map with the Top 100K on it but it is huge (Load at your own risk).

…More to come.

I will be spending some more time on this over the next couple of weeks but cant think @EngelhardtCR and @hrbrmstr enough for all the help they have been over the last week as.   They are true data scientist and I am just a hacker with a blog.  : )
If you have any questions or suggestions please let me know on twitter at @jgamblin.
Here is a picture semi related to this blog post to make it look pretty when I share it on social media. 

Site Footer